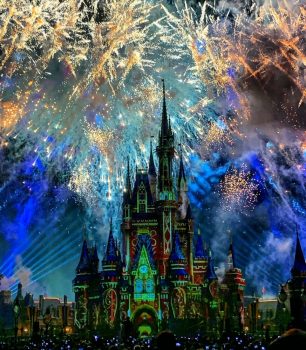
Disney World is a place filled with magic, fun, and countless photo opportunities. From the iconic Cinderella Castle to the thrilling attractions and character meet-and-greets, there are endless moments to capture. That’s where Disney’s Memory Maker comes in. A fantastic service that ensures you can take home all the magical memories from your trip. This comprehensive guide will walk you through how to use Memory Maker at Disney World.
To use Memory Maker at Disney World, first purchase it on the Disney World website or through the My Disney Experience app. Then, link it to your My Disney Experience account and have photos taken by Disney PhotoPass photographers throughout the park. You can access and download your photos via the app or website. Remember to activate your Memory Maker by clicking “Activate My Photos” in the app. You can share your photos with friends and family and have 30 days from activation to download them.
What is Memory Maker?
Memory Maker is a photo service offered at Walt Disney World Resort that lets you enjoy unlimited digital downloads of all your Disney PhotoPass photos and videos. This includes photos taken by Disney PhotoPass photographers stationed at various locations across the resort, select dining and attraction photos, and even Magic Shots.
How to Purchase and Use Memory Maker
Purchasing and using Memory Maker is easy. You can buy it on the Disney World website or through the My Disney Experience app.
- Purchase Memory Maker: You can buy Memory Maker in advance for $169 or during your vacation for $199. There’s also a one-day option available for $69.
- Link Memory Maker to your My Disney Experience account: Make sure the Memory Maker add-on is linked within your My Disney Experience account, and that all guests in your party are also linked to your account.
- Locate PhotoPass photographers: Find Disney PhotoPass photographers at various locations across Walt Disney World. You can check the My Disney Experience app for specific locations.
- Have your photos taken: When you see a PhotoPass photographer, ask them to take your picture. They will scan your Magic Band or park ticket to link the photos to your account.
- Access your photos: After your photos are taken, you can view and download them through the My Disney Experience app or website. You have 45 days from the date the photos are taken to download them.
- Activate Memory Maker: If you pre-purchased Memory Maker, you need to activate it to download your photos. Click on a photo in the My Disney Experience app, and a screen will pop up. Click on “Activate My Photos” and then “Activate” at the bottom.
- Download and share your photos: Once your Memory Maker is activated, you can download and share your photos with friends and family. You have 30 days from the date you activate your Memory Maker to download your photos and videos.
Best Locations for Memory Maker
Memory Maker is especially beneficial at specific locations and attractions in Disney World where iconic backdrops, character interactions, and on-ride photos are available. Some of these locations include Magic Kingdom, Epcot, Disney’s Hollywood Studios, Disney’s Animal Kingdom, and Disney Springs.
Sharing Memory Maker
Yes, Memory Maker can be shared among multiple people in the same party. To share Memory Maker with others, you need to link your accounts through the Family & Friends list on the My Disney Experience website or app. Once everyone is linked, the photos taken during your visit will be shared among all the connected accounts.
Limitations and Restrictions
While Memory Maker is a fantastic service, there are some limitations and restrictions that guests should be aware of. These include the fact that Memory Maker can only be linked to one guest’s Disney account and that it allows you to download photos of up to 25 members who are on your Family & Friends list.
Tips and Tricks
To make the most out of Memory Maker during your Disney World visit, follow these tips and tricks:
- Buy Memory Maker in advance to save $30.
- Arrive at photo locations early to avoid long lines.
- Familiarize yourself with the locations of PhotoPass photographers.
- Take advantage of Magic Shots for unique photos.
- Consider Memory Maker One Day for special events.
Conclusion
Memory Maker is a fantastic way to capture and store your memories at Walt Disney World Resort. By understanding how to use it effectively, you can make the most of your trip and bring home countless magical memories.
Frequently Asked Questions
Can I purchase Memory Maker after my trip to Disney World?
No, Memory Maker cannot be purchased after your trip. You can buy it in advance or during your vacation, but not after.
Is Memory Maker included in the price of a Disney World ticket?
No, Memory Maker is not included in the price of a Disney World ticket. It’s an additional service that you can purchase separately.
Can I get a refund if I don’t use my Memory Maker?
No, Memory Maker purchases are non-refundable, whether you use it or not.
Can I share my Memory Maker with people who are not in my party?
No, your Memory Maker can only be shared among the guests who are linked to your My Disney Experience account and are part of your party.
Will the PhotoPass photographers take pictures with my camera or phone?
Yes, most PhotoPass photographers will happily take a picture with your camera or phone if you ask.
Are there PhotoPass photographers in the water parks?
Yes, PhotoPass photographers are available at Disney’s Blizzard Beach and Typhoon Lagoon water parks as well.
Can I edit my photos before downloading them?
Yes, you can add fun Disney-themed borders, stickers, and other edits to your photos before you download them through the My Disney Experience app or website.

